Google OAuth
Create an OAuth client ID in the Google Console and add it as a Google OAuth integration in the Facets Control Plane to enable single sign-on.
Prerequisite
- Users must have Write on the OAuth Integration category (permission token
OAUTH_INTEGRATION_WRITE); see Permissions Reference.
How to Create an OAuth Client ID in your Google Console?
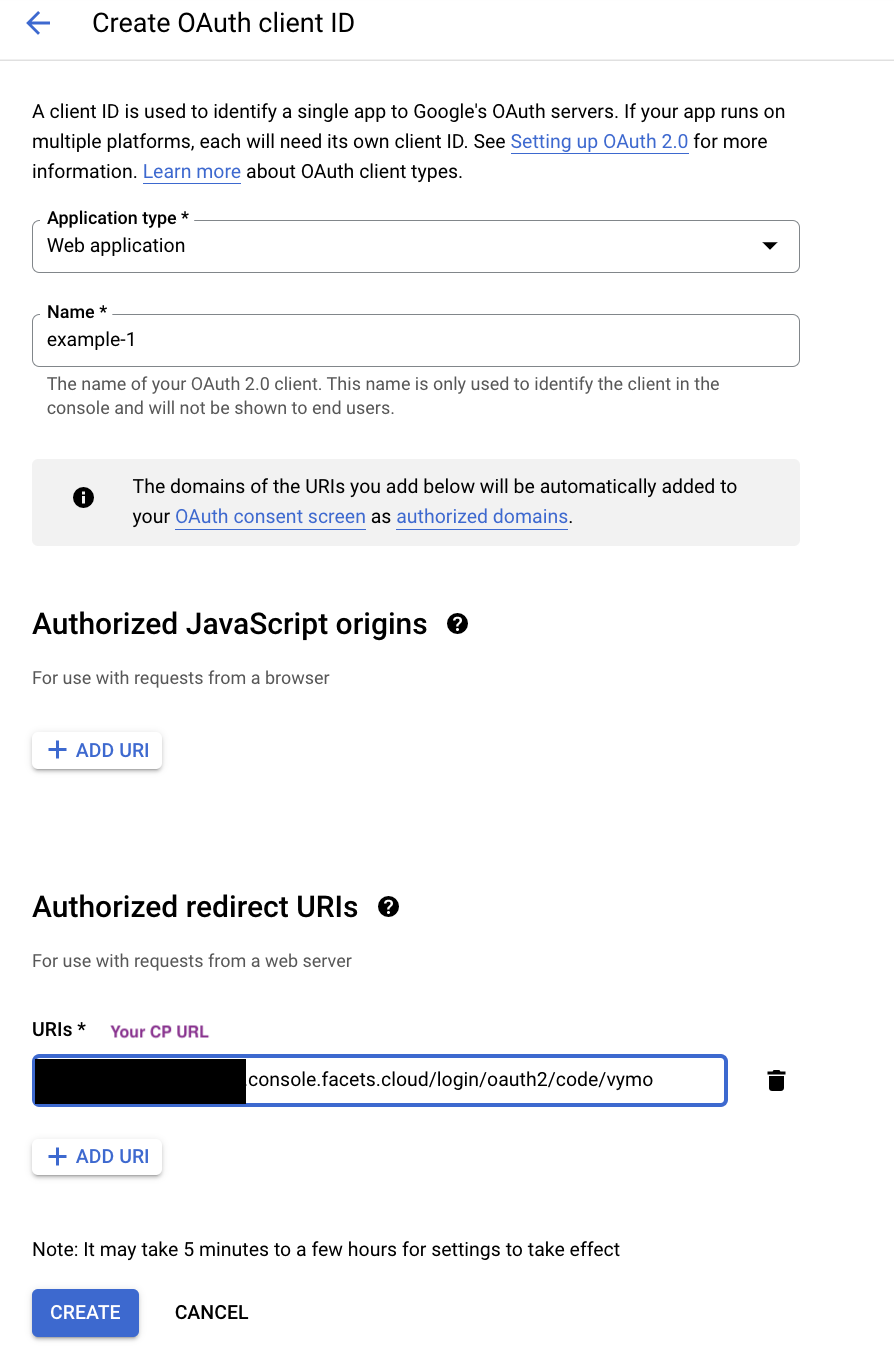
- Go to the Google Console and follow the steps in the Setting up OAuth 2.0 guide.
- Set up an Authorized Redirect URI using the following format:
<YOUR_CP_URL>/login/oauth2/code/<unique-registrationID>. - Make note of the unique Registration ID provided by Google.
- Replace
<YOUR_CP_URL>in the URI above with the unique URL for your organization's Control Plane. - We recommend using a single word, all in lower-case, as the
<unique-registrationID>. This will be used later in the Facets UI when adding the OAuth integration to your Control Plane.
- Replace
How to Add Integration for Google OAuth in Facets?
-
Navigate to Settings > OAuth Integrations from the left pane.
This page displays all the configured OAuth Integrations in Facets. -
Click Add Integrations and select Google as the Provider.
-
Fill in the following information:
- Registration Id: Use the
<unique-registrationID>from the Authorized Redirect URI in Step 1. - Client Id: Use the Client Id from your Google Console.
- Client Secret: Use the Client Secret from your Google Console.
- Login Button Text: Choose the text that will appear in the Control Plane Login screen. For example, you can use your organization's name.
- Registration Id: Use the
-
Click Create.
You have successfully set up Google OAuth integration in Facets.
OAuth Integrations
Connect OAuth identity providers including Google, Azure AD, Okta, OneLogin, JumpCloud, and generic OIDC SSO to the Facets Control Plane login.
Azure AD
Register an app in Microsoft Entra ID (formerly Azure AD) and configure it as an OAuth login provider for the Facets Control Plane, step by step.