Notification Channels & Subscriptions
Create notification channels and subscriptions in the Facets Control Plane for Slack, PagerDuty, Zenduty, Microsoft Teams, webhooks, and email.
Facets Control Plane provides the capability to create notification channels and subscriptions for receiving notifications.
This document walks you through the process of creating Notification Channels and Subscriptions.
Navigate to Settings > Notification Center to access the Notifications section.
How to Create a Notification Channel?
Using prompt
Send release failures for prod to our Slack channel.or
Using command
# Slack, Webhook, Zenduty or Microsoft Teams: the channel's webhook URL
raptor create channel oncall --type SLACK --address https://hooks.slack.com/services/XXX

# Email: users in the Control Plane, or any address
raptor create channel alerts --type EMAIL --emails a@example.com,b@example.com

# PagerDuty: the integration key as well as the address
raptor create channel pd --type PAGER_DUTY --integration-key 0123456789abcdef
raptor test channel NAME sends a test notification through a channel, which is the
Test Notifications button. -f channel.yaml creates one from a full payload instead,
and raptor set channel changes an existing one.
New to the CLI? Install it first.
- Select the Channels tab.
You'll find all the Notification Channels created within the Facets Control Plane. - Click Create Channel.
- In the UI that appears, select the Channel Type and Channel Name.
- Choose the Channel Type.
- For Slack, Webhook, Zen Duty, or Microsoft Teams: Mention the Channel URL (URL for the Webhook where you want to receive notifications).
Note: For Microsoft Teams, follow this guide to learn how to get the channel URL. - For Microsoft Teams Workflow: paste the Power Automate Workflow URL (use this instead of the classic connector URL for new Teams integrations).
- For Pager Duty: Mention the Channel URL and Integration Key.
- For Email: Select the email addresses of Users within your Control Plane and/or specify Custom Email IDs for users who are not part of the Control Plane.
- For Slack, Webhook, Zen Duty, or Microsoft Teams: Mention the Channel URL (URL for the Webhook where you want to receive notifications).
- Click Test Notifications to test the notifications.
- Click Create.
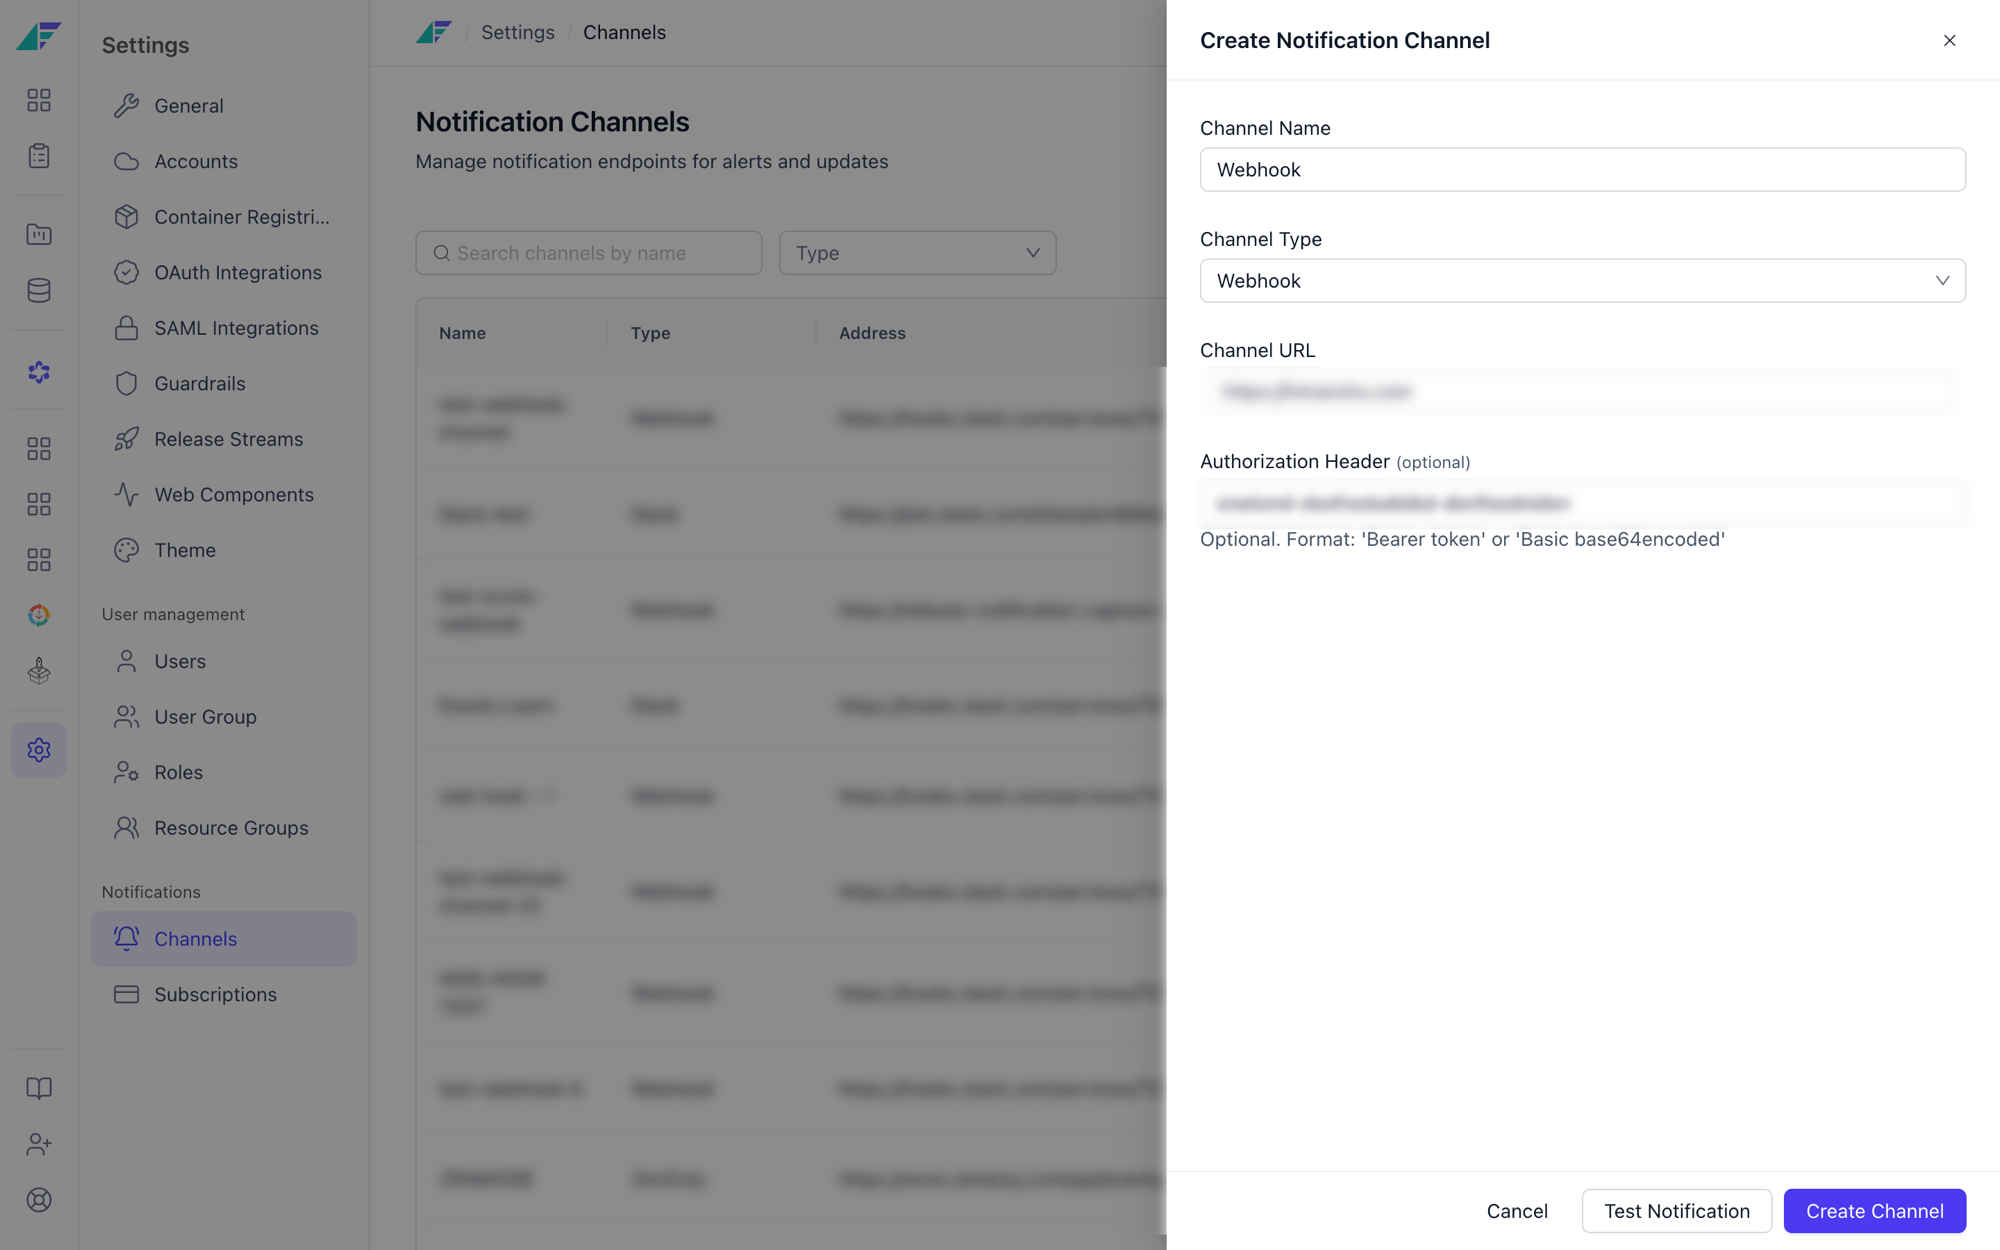
You have successfully created a Notification Channel.
How to Create Subscriptions?
Using prompt
Notify our Slack channel when a deployment to production finishes.or
Using command
raptor create subscription deploys -p PROJECT --type APPLICATION_DEPLOYMENT_COMPLETE \
  --channel-name oncall --environment production
raptor get notification-types lists the types you can subscribe to and the filter tags
each one supports. raptor get notification-tags --type TYPE gives the tags for one type
and raptor get notification-tag-values the valid values for a tag, which is how you find
what the console's filter dropdowns would have offered.
Filters go in as --filter KEY=value. Several in one flag are separated by ;, so quote
it: --filter "SEVERITY=critical,warning;ALERT_NAME=HighCPU". raptor test subscription
is the Test Notifications button.
New to the CLI? Install it first.
- Select the Subscriptions tab.
You'll find all the Subscriptions created within the Facets Control Plane. - Click Create Subscription.
- In the UI that appears, mention the Subscription Name, Notification Type, Blueprint, Channel Type, and Channel Name.
- Based on the Notification Type, you will be able to add Filters such as Alert Name, Environment Name, Release Stream, and Severity.
Note: Environment Name and Release Stream are mutually exclusive. A subscription scopes by specific environments OR by release stream, never both. - Click Test Notifications to test the notifications for the subscription.
- Click Create.
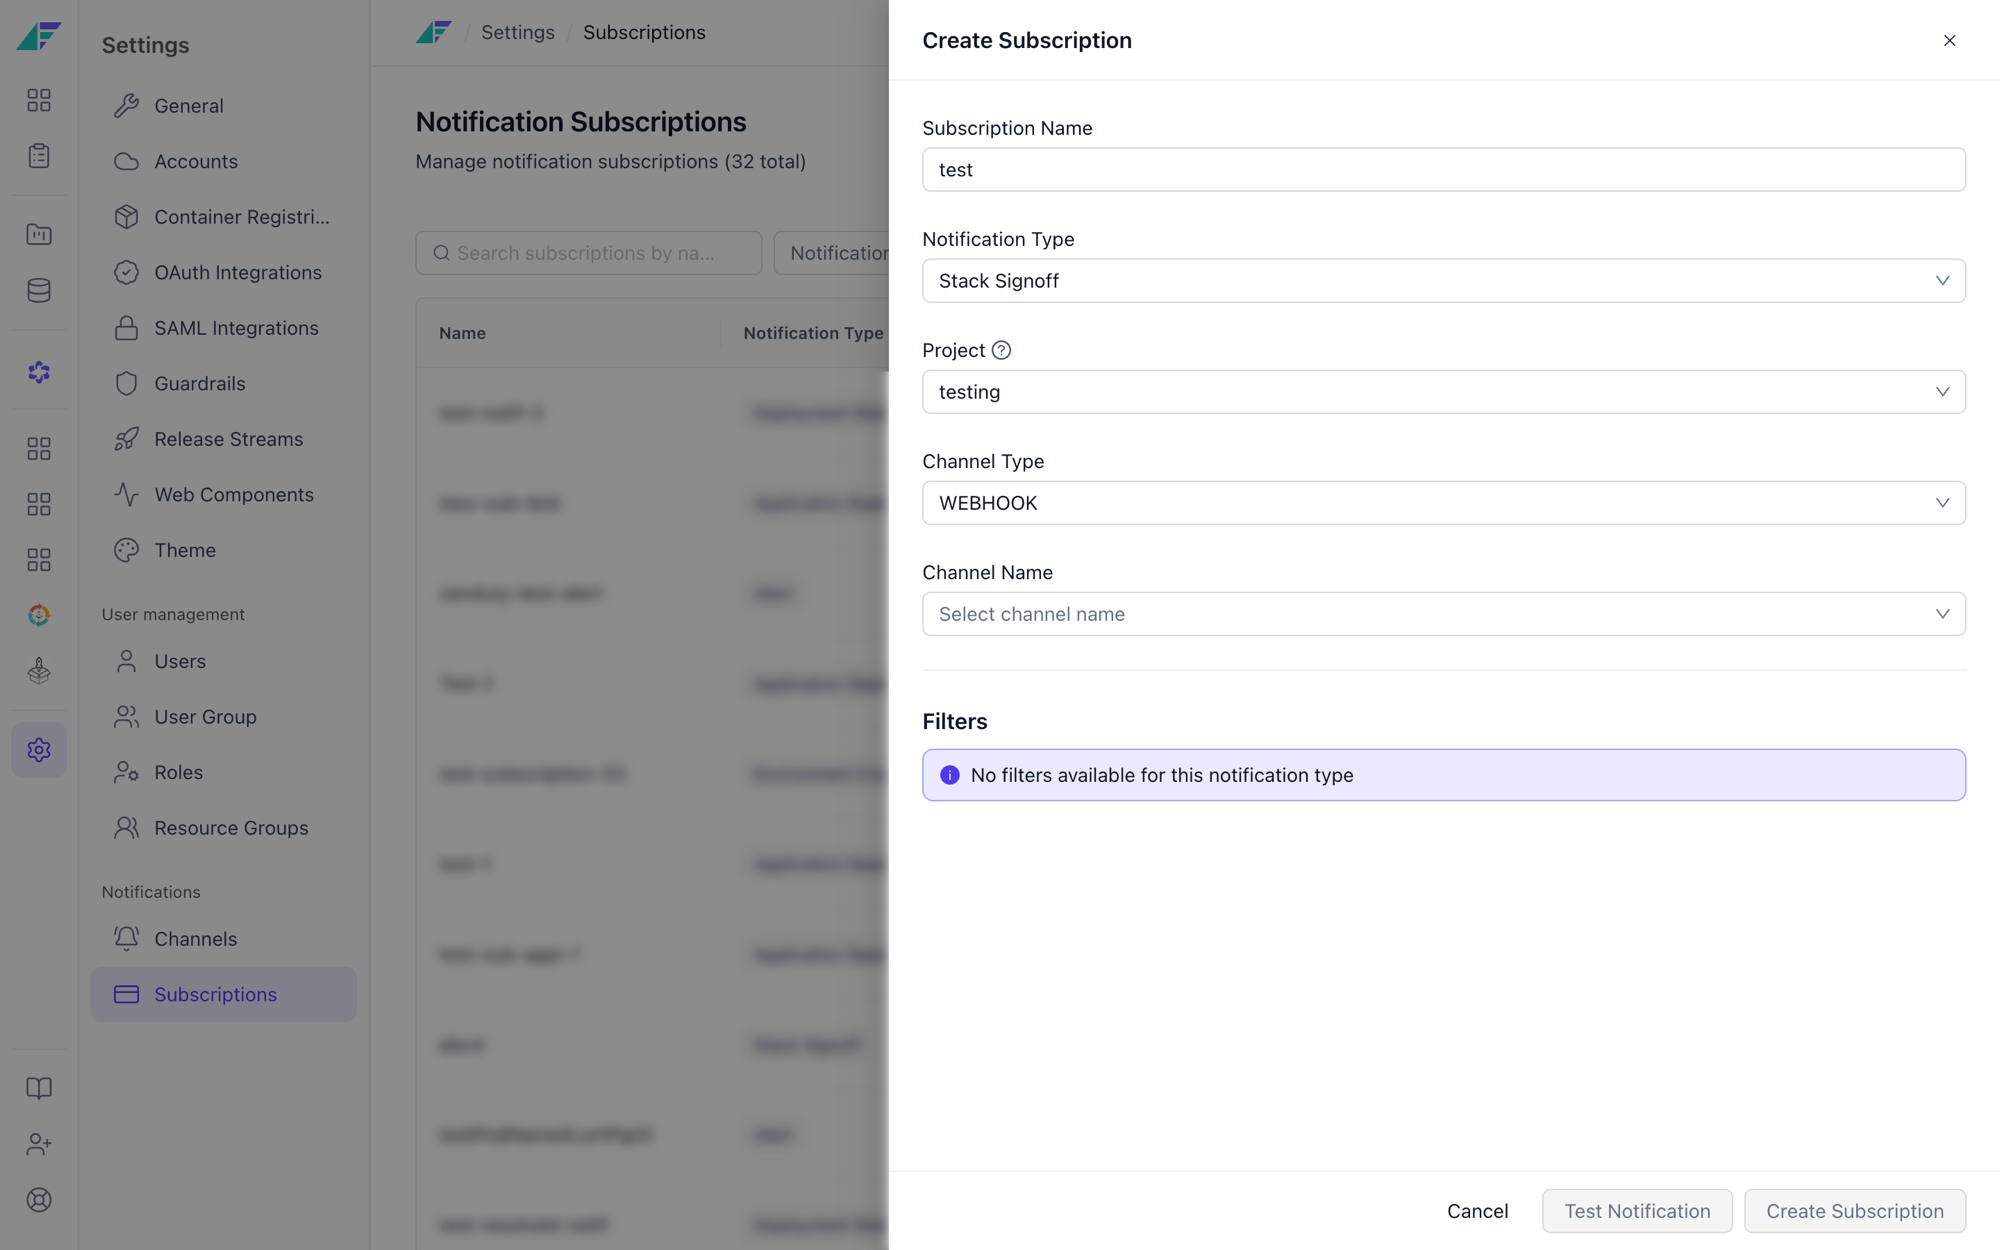
You have successfully created a Subscription.
Notifications
Subscribe to Facets notifications by Blueprint, channel, and type across Slack, PagerDuty, Zenduty, and webhooks, with advanced severity filters.
K8s Events Dashboard (Grafana)
View Kubernetes events in a Grafana dashboard from the Facets Control Plane, filtered by namespace, kind, and object name to check application health.